How is hot vulcanizing splicing done-Step3
How is hot vulcanizing splicing done-Step3
Operating procedures and processes of vulcanized joints
1. Preparations
1.1 First power off supply of the conveyor and hang up the safety warning sign
1.2 Use a lifting tool to loosen the counterweight device, and use a belt clip to pull and fix the conveyor belt to ensure that the conveyor belt is hoisted to a sufficient length. The remaining length of the conveyor belt should be convenient for peel the steel wire and placing it on the vulcanizer press flat. Make sure have enough work space.
2. Draw lines
2.1 Mark three points beyond a distance of 1000mm along the extension direction of the conveyor belt to determine the center line of the conveyor belt. These three points are the center points of the width of the conveyor belt, and ensure that at least two points are not in the joint area. Two rulers can be used to determine the center point for easy identification of the exact belt centerline.
2.2 Then use the Chalk box line to connect the three longitudinal center points into a straight line, which represents the center line of the conveyor belt. This centerline enables accurate positioning of the two belt tails of the conveyor belt joint part no incline, which is absolutely necessary for the straight running of the conveyor belt. Centerline markings outside the splice area must be legible for easy reference throughout the splice operation.
Notes: In the process of making the center line of the conveyor belt, the damage of the rubber at the edge of the conveyor belt must be fully considered. Therefore, when determining the width of the conveyor belt, it must be measured in the area where the rubber at the end of the belt is intact no any damage or break. Outside the joint area, two reference lines perpendicular to the center line are made along the width of the conveyor belt.
2.3 Draw the connector line
After the center line is marked, the joint line can be drawn according to the shape of the vulcanized plate (rectangular or rhomboid) and the joint length.
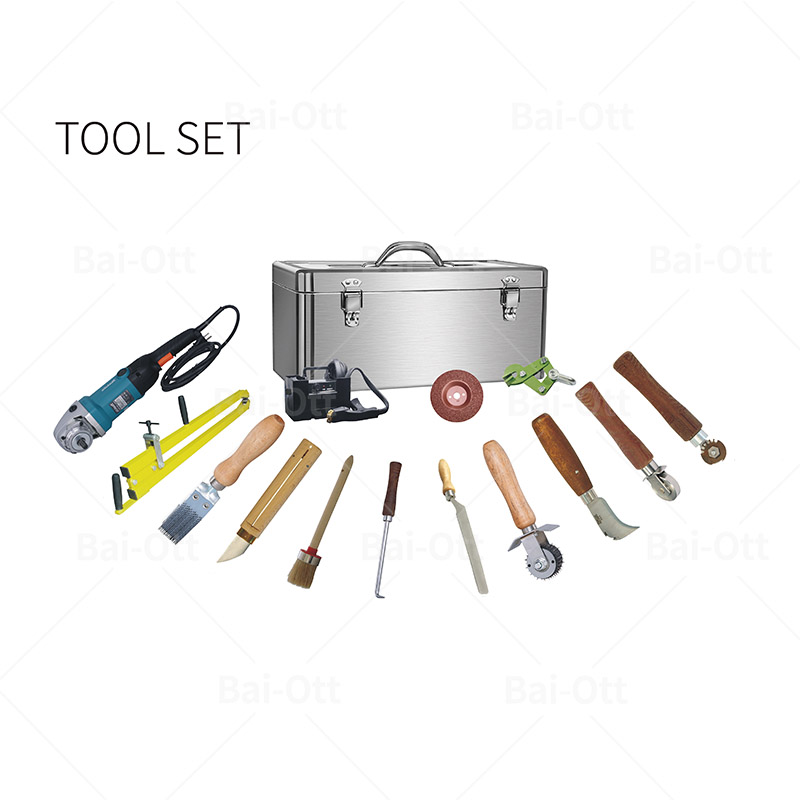
3. Pull the wire rope
3.1 First, cut a groove shape on the straight line of the center
3.2 Use special equipment or utility knife to pull out the wire rope
3.3 Trim the surface of the wire rope to ensure that a thin layer of rubber is left on the surface of the wire rope.
4. Trim the steel cord
For the plucked steel wire, cut the wire according to the joint required level and length. The joint method is divided into 4 grades according to the tensile strength.
Specified joint length and joint level length
| Grade Length and Joint Length | Middle cushion rubber specification | |||
| Model | Connection grade | Minimum grade length(mm) | Joint length(mm) | Thickness ×width(mm) |
| ST 1000 | 1 | 600 | 800 | 2×6 |
| ST 1250 | 1 | 600 | 800 | 2×7 |
| ST 1600 | 1 | 600 | 800 | 2×7 |
| ST 2000 | 2 | 400 | 1150 | 2.5×7 |
| ST 2500 | 2 | 500 | 1350 | 2.5×10 |
| ST 3150 | 2 | 650 | 1650 | 2×10 |
| ST 3500 | 3 | 650 | 2450 | 2.5×11 |
| ST 4000 | 3 | 750 | 2750 | 2.5×11 |
| ST 4500 | 3 | 800 | 2900 | 2×12 |
| ST 5000 | 4 | 900 | 4250 | 2.5×13 |
(2) Grind the transition area, and clean it thoroughly with a brush after grinding(1) Always keep the outermost steel wires on both sides of the conveyor belt with the longest dimension
(3) When cleaning the wire rope, it is best to use a brush to clean one by one, so as to ensure that the surface of the wire rope is completely cleaned
(4) Brush on hot splicing cement on the surface of the cleaned steel wire rope. It is required that the brushing is even without leakage, and waiting it dry completely for about an hour.
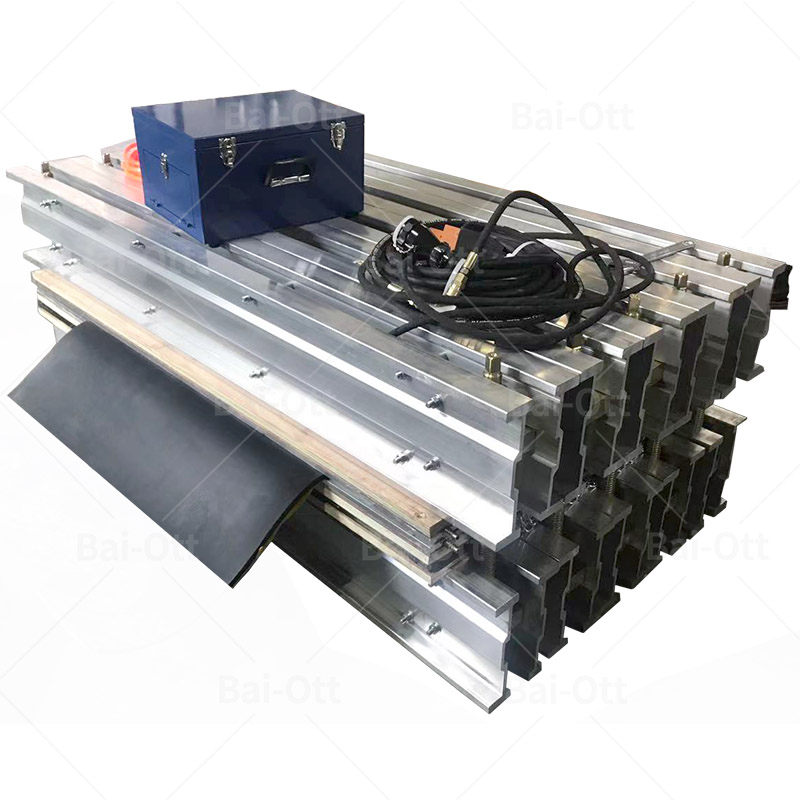
5. Place the vulcanizer
5.1 Clean up the operation area. If the area is not flat enough, you need to place the based plate
5.2 Place the vulcanizer beams side by side on the operation desk or on the based plates
Note: When placing the beams of the vulcanizer, pay attention that the distance between the beams should not be too large.
5.3 Place the water pressure bag plate on the beam of the vulcanizing machine. The number of the water pressure bag is determined according to the length of the joint and the width of the hydraulic plate.
Note: Before placing the water pressure plate, it is necessary to check whether the water pressure bag is leaking and whether the water pipe joints are in good condition.
5.4 Place the insulation board on the water pressure board
Note: The area of the insulation board cannot exceed the water pressure bag.
5.5 Place the heating plate on the insulation board
Note: The heating plate needs to be tested before placing it. If the heating plate does not heat up or heats up slowly, the heating plate needs to be replaced. Or contact the manufacturer to find out what the problem is.
5.6 Place a layer of silicone paper on the heating plate to prevent the conveyor belt from sticking to the vulcanizer press after vulcanization.
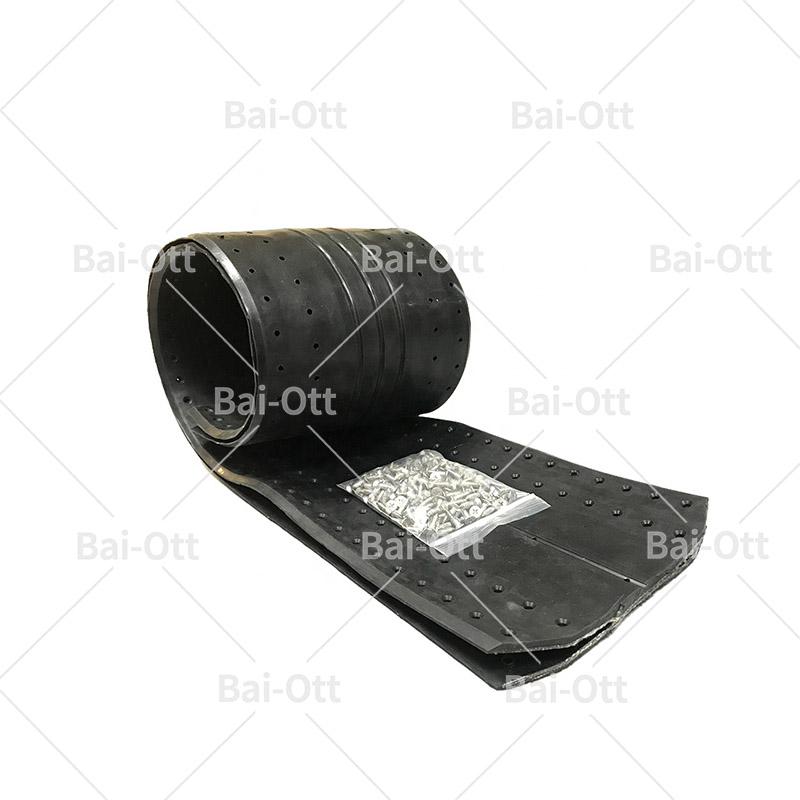
6. Place the bottom uncured cover
Place the bottom uncured cover on the heating plate and brush hot vulcanizing cement on it. (The lower cover rubber is composed of the surface rubber and the core rubber vulcanized together with a hot vulcanizing agent)
7. Place the steel cord
After the hot vulcanizing agent on the surface of the bottom cover rubber dry until it is slightly sticky, start to place the steel wires in the order of the overlap level.
Note: Firstly place the central steel cord selected in advance, and the steel wire at both ends are placed as order. Each two steel wire ropes need to be separated by a uncured tie gum rubber noodle (the core rubber width is 1mm larger than the diameter of the steel wire rope)
8.Brush hot splicing cement on the steel cord wire
Brush cement on steel wire which have been place orderly, and wait the cement dry till little sticky when you touch by your hand.
9. Stick on the uncured top cover rubber on the steel cord
10. Trim the extra cover rubber as conveyor belt width.
Note: Remember to put in some uncured cover rubber on the both sides of the conveyor belt joint part to make up the gap and lack, because cover rubber is more wear abrasive.
11. Place the stopper guard plate and the top heating plate
Place stopper guard plate with the same thickness as the conveyor belt beside both sides of the trimmed cover rubber (the stopper is close to both sides of the conveyor belt and compacted), and after the stopper is placed, place a heating plate (Separate the heating plate and the cover rubber by a silicone paper)
Note
(1) It is necessary to test heating plates before use it. If the heating plates heat up slowly or no heat, change it or repair or ask the machine supplier how to do.
(2) Before placing the heating plate, use needle roller to pierce the uncured cover glue more intensively to ensure that the air between the cover glue layers can be discharged smoothly
12.Put on the top insulation plate
13.Place the cross beam of the vulcanizer and the locking rod to fix the stopper guard plate.. Top beams need to be aligned with the bottom beams one by one. And then lock on the press machine bolts and confirm every bolts are tightly to guarantee pressure after start working.
Note:
(1) Adjust the position of the beams before the screw it to prevent the screws or beams part cover the power supply socket and water source connect mouse. If cover please change the beam position, the machine have enough size and make small adjust.
(2) Don’t locked and press the stopper guard iron plate too tight with the conveyor belt sides, just ensure the plate close to the conveyor belt and the conveyor belt is not deformed will be enough but don’t press more.
14.Rise pressure
Rise the water pressure bag to 1.5 Mpa and then release the pressure. After release all pressure then lock the all bolts and screws. After lock the beam and screws, rise the pressure bag to 1.5 Mpa again.
15. Vulcanization
First heat the vulcanizer to 110°C and keep at 110°C for 15 minutes. After the 15 ℃ heat preservation is completed, heat the vulcanizer to 145°C to start splicing. The vulcanization time is (conveyor belt thickness * 3) minutes .If you have professional technicians who with enough experience for the splicing operation, ask him or her to control the time and pressure as the ecaxt site situation.
Notes: When the vulcanizer is kept at 110°C, the preservation time must be sufficient. The rubber fluidity performance is the best at 110°C, which can ensure the uncured rubber materials uniformity after vulcanization. During the heat preservation time, the pressure must be also kept on 1.5 Mpa. If the pressure drops, it should be replenished in time. .
16.Disassemble the press machine after it cool down.
After the vulcanization is completed, release the water bag pressure after the heat below 80°C, and then disassemble the vulcanizing machine.
Note: During the cooling process, the pressure of the water pressure bag still should be maintained. If the pressure is too low, the forming effect of the conveyor belt will be affected.
17. Finishing work
Cleaning up the construction site, organizing tools, etc.
Conclusion: All conveyor belts must be connected in a endless ring before use, so the quality of the conveyor belt joint directly affects the service life of the conveyor belt and whether the conveyor line can run smoothly and smoothly. With the wide application of belt conveyors, the quality requirements for conveyor belt joints are getting higher and higher. At present, there are mainly three types of joints for belt conveyors, which are mechanical joints,cold bonding joints, hot vulcanized joints. Mechanical joints have the disadvantages of belt being inconvenient for mechanical cleaning and also bring large wear on rollers; cold bonding joints have low strength and are generally only used in emergencies. ;The hot vulcanization joint has proved to be the most ideal joint method in many years of actual combat, which can ensure high joint efficiency, the joint effect is very obviously good, the joint life is long, and the operation method is easy to master. In the operation of hot vulcanized joints, it is necessary to consider the specific properties of the transportation materials, including: bulk density, particle size of the material, maximum lumpiness, humidity of the material, abrasion, cohesion and friction coefficient of the material, as well as the conveying volume, all of these must be included in the hot splicing construction.